Proper Form for Women: Strength Training Cues That Matter
 Aug, 17 2026
Most women don’t fail at the gym because they lack motivation. They fail because they’re guessing at their form. You’ve probably seen a trainer yank someone’s shoulders back or tell them to “squeeze your glutes,” but without context, those cues feel random. The truth is that proper form isn’t just about looking good; it’s about protecting your joints and actually getting stronger. When you nail the mechanics, you stop relying on momentum and start building real muscle.
This guide breaks down the specific biomechanical adjustments that matter most for women. We aren’t talking about generic advice like “stay tall.” We are looking at how pelvic positioning, knee tracking, and breath control change the game for the average female body structure. If you want to lift heavier without pain, these are the cues to drill into your next session.
The Pelvis Problem: Why Neutral Spine Is Everything
If you only remember one thing from this article, make it this: your pelvis dictates your entire movement quality. Many women struggle with either an anterior pelvic tilt (arching the lower back) or a posterior tilt (tucking the tailbone under). Both extremes create leverage problems that force your spine to take loads it wasn’t designed to handle.
Pelvic Neutrality is a position where the front and back of the pelvis are level, allowing the lumbar spine to maintain its natural curve without excessive compression or extension. Think of your pelvis as a bucket of water. If you tip it forward, water spills out the front (anterior tilt). If you tip it back, it spills out the back (posterior tilt). You want the water to stay in the bucket.
How do you find this? Stand against a wall with your heels six inches away. Try to flatten your lower back against the wall. Now, arch it slightly. The midpoint between those two positions is your neutral zone. This is your home base for every squat, deadlift, and lunge. When you lose this neutrality, you’re no longer moving efficiently; you’re compensating.
Squat Mechanics: Stopping the Knee Cave
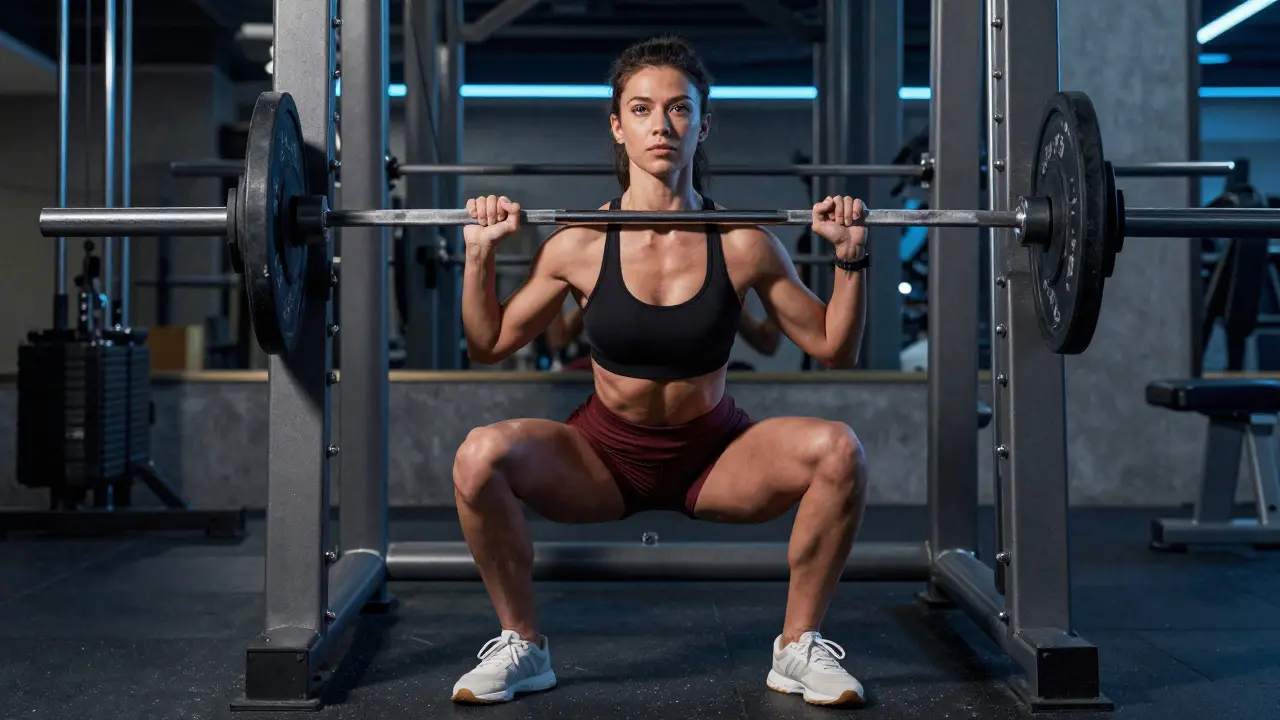
Knee valgus-when your knees collapse inward-is the most common error I see in women performing squats. It’s often blamed on weak hips, but it’s usually a coordination issue. Your feet are likely planted too narrow, or your center of gravity has shifted forward onto the balls of your feet.
Here is the fix: widen your stance until your toes point slightly outward, roughly 15 to 30 degrees. This opens up the hip joint and gives your knees a clear path to track over your second and third toes. As you descend, actively push your knees apart against the barbell or resistance band. This engages the gluteus medius, which acts as a stabilizer for the entire lower body.
Don’t just think “knees out.” Think “spread the floor.” Imagine you are trying to crack a walnut with your thighs. This mental cue activates the external rotators of the hip, keeping the femur stable while the tibia moves. If your knees still cave, check your ankle mobility. Tight calves can force your ankles to roll inward, dragging your knees with them. Dorsiflexion drills before leg day are non-negotiable for long-term progress.
Hinge Patterns: Protecting the Lower Back
Deadlifts and Romanian Deadlifts (RDLs) are hinge movements, not squats. Yet, so many women turn RDLs into half-squats, loading the quads instead of the hamstrings and glutes. The difference lies in where the movement initiates.
A proper hinge starts at the hips. Push your hips back as if you are trying to close a car door with your butt. Your shins should remain relatively vertical throughout the descent. If your knees bend significantly before your hips move back, you are squatting. To cue this, hold a dowel along your spine. Keep it touching three points: the crown of your head, your upper back, and your lower back. If the dowel falls off your lower back, you have lost your hinge.
For women with shorter torsos, this can be tricky because the lever arm is different. You might need to use a slightly narrower grip or focus more on driving through the mid-foot rather than the heel. The goal is to keep the tension in the hamstrings, not the lower back. If you feel pinching in the lumbar region, you’ve gone too deep or lost your brace. Reset, breathe, and try again with lighter weight.
Breathing and Bracing: The Core Connection
Your core isn’t just your abs. It’s a cylinder of muscles that includes your diaphragm, transverse abdominis, multifidus, and pelvic floor. Most people treat breathing as an afterthought, exhaling randomly when they get tired. But controlled breathing creates intra-abdominal pressure, which acts like a natural weightlifting belt.
Try the 360-degree brace. Take a deep breath into your belly, ribs, and back. Imagine zipping up a tight jacket all the way around your torso. Hold that tension for two seconds, then release. Do this before every rep. It doesn’t mean you hold your breath for ten seconds; it means you maintain that internal pressure while you move.
This is especially critical for compound lifts. If you bracing fails, your spine relies on passive structures like ligaments to stay upright. Those structures don’t love being stretched under load. Proper bracing allows you to lift heavier weights safely because the force is distributed evenly across the abdominal wall.
Upper Body Alignment: Shoulders and Scapulae
We often neglect the upper body in favor of legs, but shoulder impingement is rampant among women who bench press or overhead press. The culprit is usually protracted scapulae-shoulders rolled forward. When your shoulder blades slide away from your spine, the space between the humerus and the acromion narrows, pinching the tendons.
The cue here is “shoulders down and back.” Before you press, retract your scapulae slightly, as if you are trying to put your armpits into your back pockets. Then depress them, pulling them toward your waist. This creates a stable base for the deltoids to work from. If you feel a pinch in the front of your shoulder during a press, you’ve likely let your scapulae drift forward. Stop, reset, and re-engage.
Also, watch your elbows. During a bench press, keep them at roughly a 45-degree angle to your torso. Flaring them out to 90 degrees puts immense stress on the rotator cuff. Tucking them in too much (less than 30 degrees) shifts the load to the triceps and can cause elbow strain. Find the middle ground where you feel strong and stable.
| Movement | Error | Corrective Cue | Target Muscle Group |
|---|---|---|---|
| Squat | Knees caving inward | Spread the floor / Push knees out | Gluteus Medius |
| Deadlift | Rounding lower back | Brace core / Chest proud | Erector Spinae |
| Bench Press | Shoulders shrugged up | Shoulders down and back | Traps / Rhomboids |
| Lunge | Front knee collapsing | Track knee over toe / Drive through heel | Quadriceps / Glutes |
Why These Cues Matter More for Women
You might wonder why we emphasize these specific points for women. It comes down to anatomical differences. On average, women have wider hips relative to their shoulders. This changes the angle of the femur, making the knee joint more susceptible to valgus forces during dynamic movements. Additionally, hormonal fluctuations can affect ligament laxity, particularly during certain phases of the menstrual cycle. This means that what works perfectly on Monday might feel unstable on Thursday.
Recognizing this variability is key. Instead of forcing a rigid form that ignores your body’s daily state, use these cues as adjustable levers. If your knees feel loose today, add a resistance band around your thighs to provide tactile feedback. If your lower back feels stiff, prioritize the pelvic neutrality check before lifting. Adaptability is part of proper form.
Building the Habit: Practice Without Pressure
Learning new motor patterns takes time. Don’t expect perfection on day one. Start by practicing these cues with bodyweight or light dumbbells. Film yourself from the side and front. Compare your video to the descriptions above. Look for deviations in your pelvic position, knee tracking, and shoulder placement.
Consistency beats intensity. Spend five minutes each day focusing on one cue. For example, dedicate this week to pelvic neutrality. Next week, focus on knee tracking. By breaking down complex movements into manageable components, you build neural pathways that make correct form automatic. Eventually, you won’t have to think about it. Your body will just know.
Strength training is a lifelong journey. The better your form, the longer you’ll enjoy it. So, next time you step onto the gym floor, slow down. Listen to your body. And trust the process.
What is the best way to check if my squat form is correct?
Film yourself from the side and front. From the side, ensure your hips and knees descend together and your chest stays up. From the front, check that your knees track over your second and third toes without caving inward. Use a mirror or a phone app to review your movement slowly.
Do women need different strength training cues than men?
While the fundamental principles of physics apply to everyone, women often benefit from extra emphasis on pelvic stability and knee alignment due to wider hips and ligament characteristics. Cues like “spread the floor” or “keep the pelvis neutral” are particularly helpful for addressing common structural tendencies.
How important is breathing during heavy lifts?
It is critical. Breathing correctly creates intra-abdominal pressure that supports the spine. Without proper bracing, the lower back bears more load, increasing the risk of injury. Always inhale deeply before the exertion phase of the lift and maintain that brace throughout the movement.
What should I do if my knees hurt when I squat?
First, reduce the range of motion to avoid painful angles. Second, check your foot position; widening your stance may relieve pressure. Third, strengthen your gluteus medius and improve ankle mobility. If pain persists, consult a physical therapist to rule out underlying issues.
Can I learn proper form without a personal trainer?
Yes, but it requires self-awareness and consistency. Use video analysis, follow detailed cues, and progress gradually. However, if you have pre-existing injuries or significant mobility limitations, working with a certified professional can provide personalized feedback that mirrors or videos cannot.