DIY Home Projects for Beginners: Women’s Weekend Wins
 Jan, 11 2026
Ever looked around your home and thought, “I could fix that”-but didn’t know where to start? You’re not alone. Many women begin their DIY journey not because they want to become contractors, but because they want their space to feel like theirs. And the best part? You don’t need a toolbox full of fancy tools or a background in construction. Just a Saturday afternoon, a clear goal, and a little courage.
These projects aren’t about redoing your whole kitchen or tearing down walls. They’re small, satisfying, and designed for people who’ve never held a power drill before. Think of them as home wins-tiny changes that make your space feel more comfortable, more beautiful, and more you.
Paint an Accent Wall (Without the Panic)
Painting is the easiest way to transform a room. But picking the right color? That’s where people freeze. Start simple: pick one wall. Not the whole room. One wall. Maybe the one behind your bed, your couch, or your desk. It’s called an accent wall, and it’s the perfect first project.
Here’s how to do it without stress:
- Use painter’s tape to protect trim, ceilings, and adjacent walls. Don’t skip this-it saves hours of cleanup.
- Buy a sample pot of paint. Test it on a corner of the wall. Live with it for a day. Light changes everything.
- Use a roller for big areas, a brush for edges. One coat often isn’t enough. Two is the sweet spot.
- Let it dry overnight. Then step back. You’ll be amazed.
Popular colors for beginners? Soft gray, warm white, sage green, or muted blue. These tones calm the space instead of overwhelming it. A study from the Color Association of the United States found that people in rooms with soft, cool tones reported feeling 27% more relaxed after one week. You don’t need a therapist when you have the right paint.
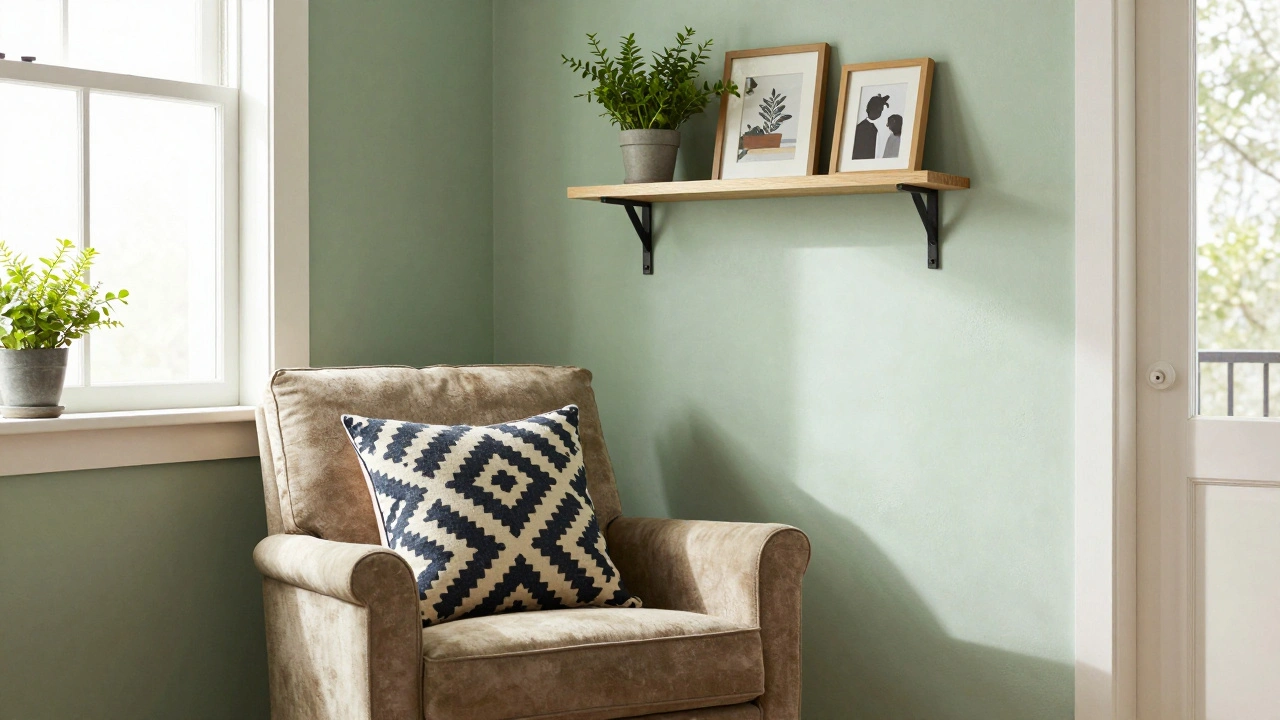
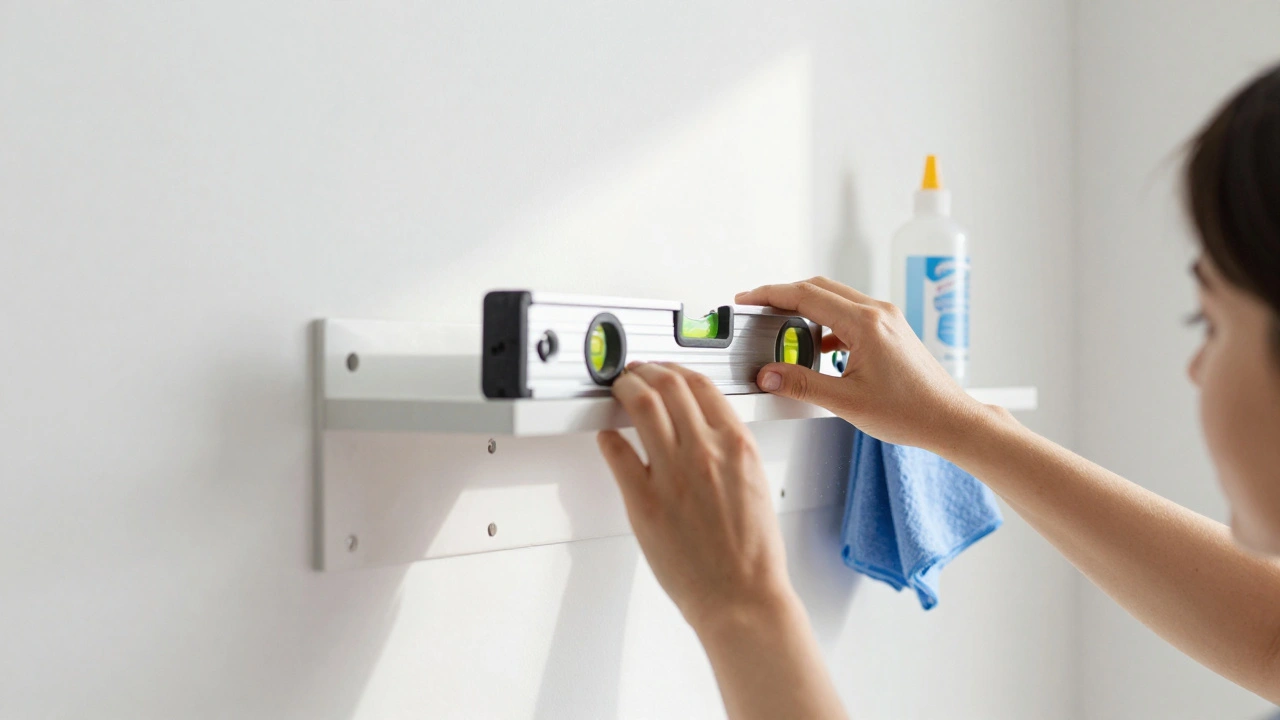
Install Floating Shelves (No Wall Damage)
Want to display your favorite books, plants, or photos without drilling into studs? Floating shelves are the answer. And yes-you can install them without a stud finder.
Look for shelves with adhesive strips or tension brackets. Brands like Command™ and Hangman make shelves that hold up to 16 pounds using strong, removable adhesive. Perfect for lightweight decor, small plants, or framed art.
Steps:
- Clean the wall with rubbing alcohol. Let it dry completely. Dust ruins adhesion.
- Use a level. Even a 1/4-inch tilt is noticeable.
- Press the shelf firmly for 30 seconds. Wait 1 hour before loading it.
- Start light: one book, one small plant. Test it before adding more.
Pro tip: Place shelves at eye level. That’s where your eye naturally lands. You’ll feel like your space has more personality-without spending a dime on contractors.
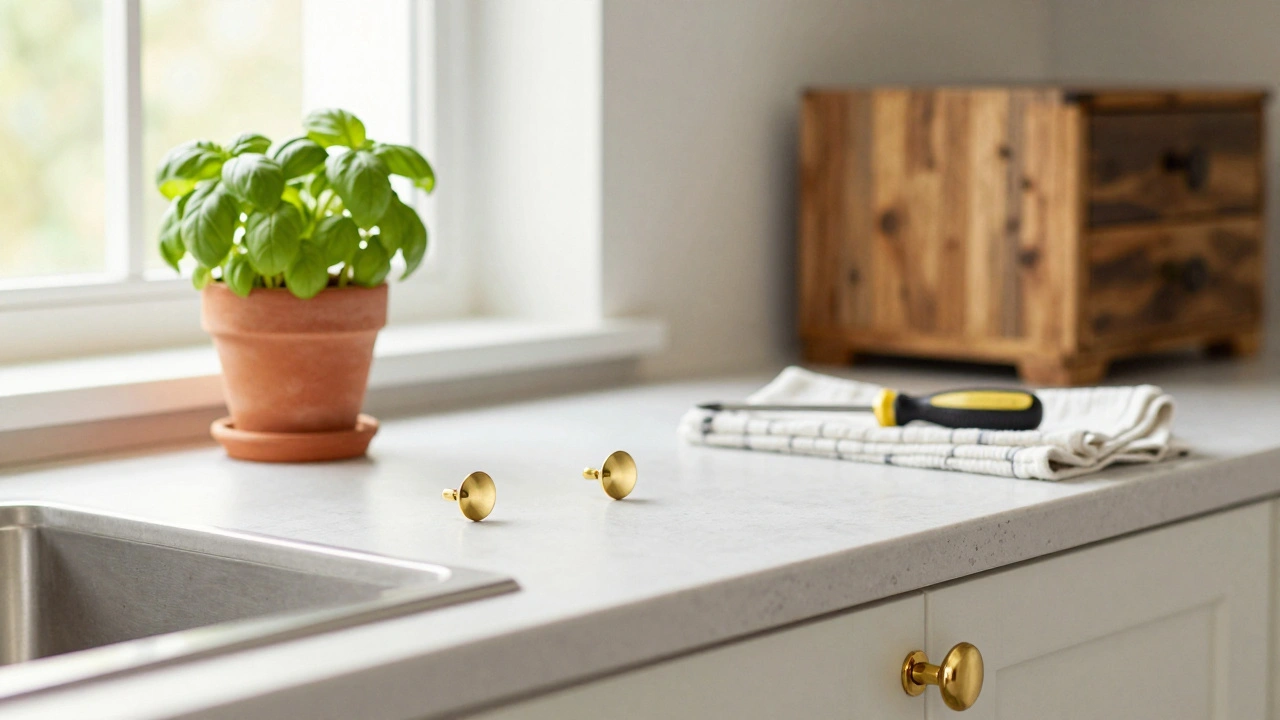
Upgrade Your Cabinet Hardware
Old, dull knobs and pulls? They’re dragging your kitchen or bathroom down. Swapping them out is one of the fastest, cheapest, and most dramatic upgrades you can do.
Go to a hardware store and pick out 5-10 new pulls. You don’t need to replace them all at once. Start with your kitchen cabinets. Try brushed brass, matte black, or ceramic knobs. They’re under $2 each.
How to do it:
- Remove the old hardware with a screwdriver. Keep the screws-you’ll need them.
- Match the center-to-center distance (the gap between screw holes). Most new pulls fit standard holes.
- Don’t over-tighten. Just snug. Overtightening strips the wood.
Afterward, you’ll notice something surprising: your cabinets look brand new. No painting. No sanding. Just a $30 investment and 45 minutes of your time.
Build a Simple Herb Garden on Your Windowsill
Herbs don’t need a yard. They just need sunlight and a little attention. A windowsill herb garden brings life into your kitchen-and your meals.
Start with three easy herbs: basil, mint, and parsley. They grow fast, smell amazing, and don’t need much space. Use small pots with drainage holes. Terracotta or ceramic works fine.
How to set it up:
- Fill pots with potting soil-not garden dirt. It’s too heavy.
- Plant seeds or buy small starter plants from a nursery.
- Place them in a south-facing window. At least 6 hours of sun a day.
- Water lightly every 2-3 days. Let the soil dry out between waterings.
After a month, you’ll be snipping fresh basil for your pasta or mint for your tea. It’s not just decor. It’s food you grew yourself. And that feels powerful.
Reupholster a Chair Cushion (Yes, Really)
That old armchair? The one with the saggy cushion and faded fabric? You can fix it. No sewing machine needed.
Grab a staple gun, some outdoor fabric (it’s durable and comes in fun patterns), and a pair of scissors. Remove the old cushion cover. Use it as a template. Cut your new fabric about 2 inches bigger on all sides.
Flip the cushion over. Lay the fabric face-down. Pull the fabric tight over the edges and staple it to the bottom. Start in the middle of each side, then work toward the corners. Fold corners like a gift wrap.
It takes about 90 minutes. You’ll have a chair that looks like you bought it new. And you’ll know you did it yourself.
Why These Projects Work for Beginners
These five projects share something important: they’re forgiving. You can mess up and fix it. You don’t need to be perfect. You just need to start.
They also fit into a weekend. No need to plan a week off. Saturday morning: paint. Sunday afternoon: install shelves. By Monday, your home feels different. Not because you tore it apart-but because you added something real.
And here’s the quiet win: each project builds confidence. You start thinking, “If I can do this, what else can I try?” That’s how real change happens-not in grand overhauls, but in small, repeated wins.
What to Avoid as a Beginner
Not every DIY project is a good first step. Skip these until you’ve got a few under your belt:
- Replacing a toilet or sink. Plumbing leaks are expensive.
- Installing flooring. Laminate sounds easy, but uneven subfloors ruin the look.
- Electrical work. Even replacing a switch can be risky without training.
- Removing load-bearing walls. Don’t even think about it.
Stick to surface-level changes. Things you can undo. Things that don’t need permits. That’s how you learn without panic.
Tools You Actually Need (And What You Don’t)
You don’t need a full workshop. Here’s your starter kit:
- Paintbrushes and rollers
- Painter’s tape
- Level (a $8 one from the hardware store)
- Screwdriver (Phillips and flathead)
- Staple gun (for upholstery)
- Measuring tape
- Drill with a 1/4” bit (optional, but helpful for shelves)
That’s it. You can buy all of this for under $75. No need to spend hundreds on tools you’ll never use again.
Where to Find Inspiration
Don’t get lost scrolling Pinterest. Instead, try this:
- Visit a local home improvement store. Look at the sample boards. Touch the fabrics. Smell the paint.
- Check out thrift stores. You’ll find cheap frames, vases, and chairs you can repaint or reupholster.
- Follow accounts like @DIYwithJen or @TheSimpleHome on Instagram. Real people. Real results. No staged lighting.
Real inspiration doesn’t come from perfection. It comes from progress.
Final Thought: Your Home Is Your Sanctuary
You don’t need to be a designer to make your space feel like home. You just need to care enough to try. These projects aren’t about impressing anyone. They’re about creating moments where you pause, look around, and think, “I made this.”
That’s the real win. Not the Instagram post. Not the praise. Just you, in your own space, feeling calm, proud, and at peace.
Do I need to be good with tools to do these projects?
No. These projects are designed for people who’ve never used a power drill. Most only need a screwdriver, tape, and a level. If you can follow step-by-step instructions, you can do these. The tools are simple. The confidence is what grows.
How much time do these projects take?
Most take between 1 and 3 hours. Painting a wall might take a full day if you’re doing two coats. Upgrading hardware? 45 minutes. Shelves? 60 minutes. The whole weekend? You can easily complete three of these without rushing.
What if I mess up the paint job?
Paint is forgiving. If you get drips, let them dry, then lightly sand them with fine-grit sandpaper. Wipe clean and touch up. If you hate the color? Paint over it. You can repaint any wall as many times as you want. There’s no such thing as a permanent mistake here.
Can I do these if I rent?
Absolutely. All these projects are renter-friendly. Paint can be covered later. Adhesive shelves come off cleanly. New hardware can be swapped back. You’re not damaging the property-you’re enhancing it. Landlords often appreciate a well-maintained space.
Where can I buy affordable supplies?
Home Depot, Lowe’s, and IKEA are great for basics. For unique finds, check out thrift stores, Etsy (for hardware), or local garage sales. Many stores have clearance sections for paint samples and leftover materials-often half price. Don’t overlook the “oops” paint aisle.